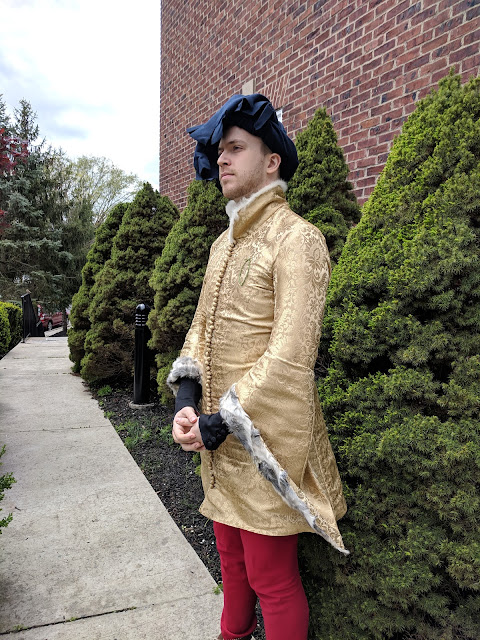
14th Century Doublet and Hose


Of course, I neglected to take a photo of me in just this layer, so oops. The doublet also has a ton of issues with it. I learned a lot during the process, but despite my goal of being able to wear it by itself, it has too many flaws to make that work well.
As with the rest of the process, I had a ton of help with fitting and drafting from my very talented friends.
Hose
On the advice of my more historically-versed friends, I decided to make a pair of separate, but very high, hose in order to match the historical examples, such as from the hose section of my earlier post, and because I have nice legs. The Thing To Do with hose in this period is to cut them from a fine, worsted wool, on the bias.
What that means is a wool that hasn't been felted, so the fibers can slide past each other, and to cut it so that the diagonal of the fabric is oriented up and down the leg. This gives it stretch in that direction. If you don't do both of these things, you don't get the stretch, so it won't fit right.
My friend Vivian draped a pattern on me, which I proceeded to cut out and assemble. The foot bottom is not strictly documentable, but it's close, and doesn't show within shoes anyway.
 |
| I envy my mother's large cutting table |
 |
| The front small pieces are the foot uppers, and the center pieces are the foot bottoms |
 |
| Thankfully my legs are symmetrical enough that I only had to make one pattern |
 |
| Basting |
I made the decision to do the back seam in a flatfell, using a whip stitch on both sides of the seam to preserve stretch. This was fine, but was pretty fiddly. When I do this again I'll need to investigate other seam treatments.
Later, once the doublet was assembled, my friend Ibrahim helped me proof the fit and get the height of the hose polished, which revealed that an additional bit of fabric had to be added to the rear to properly cover my butt. To finish the edge, I put on a facing of silk strips from off cuts of the doublet liner. Some of these were on the straight grain (more documentable) where the hose was on the straight grain, but I also cut some on the bias because I wanted it to work more easily.
The silk provides extra strength to receive the eyelets, but makes for kind of an odd look: in the future, I'd rather leave enough extra wool to just make a hem.
 |
| Scandalous! |
Initially, I only put one eyelet per hose tie in the hose, and stitched the tie to the linen band I had in the doublet. This was a bad decision: the cheap rattail cord I was using (which is not the right cord to use, but it's what I had) was pulling through the eyelets even with a knot in it, and when it didn't, it tore out of the hose band.
For the second wearing, I moved to using two eyelets on both the band and the hose, which was much more stable.
The Doublet
Much more complicated was the doublet. I got a lot of very expert help fitting a precise muslin, which I used for both the doublet and the cotehardie over it. I wanted this to be fitted, and to be low enough that I could wear it without a cotehardie and not flash people. I realize now that this was probably not the right goal: a shorter doublet works better mechanically with the hose, and as long as I'm wearing braies it doesn't really matter if they show.
One interesting thing I learned in the fitting process was that I'm actually pretty asymmetrical: my right front and left back quarters are larger than their neighbors. As a result of this, the center line is actually not in the middle, but rather is a little toward the right on the front, but this gives a better illusion of symmetry.
I chose a very fine black twill wool as the fashion fabric (well, it didn't burn test as 100% wool but shhhh), and a fine white-grey silk as a lining. The wool had a few holes in it which I told myself I would carefully cut around. Naturally, I missed one, so I had to patch it.
 |
| Tracing the front muslin onto the wool |
 |
| Tracing a back panel onto the lining silk |
 |
| Basting the center back. Oh boy do I love my grid ruler |
 |
| You can see just how different the two back panels are |
 |
| Drafting a sleeve. Mathematical! We wound up not using this one |
 |
| The sleeve that was. This is the underarm half of the sleeve. I was able to use the cut line from the center back, with its slight curve, to be extremely fabric efficient here. |
 |
| I resolved the "right side of fabric / right side of body" ambiguity with Chinese. I eventually changed to 左/右 正/反 rather than 對 because it's shorter and more idiomatic. |
 |
| The sleeves become interestingly three-dimensional |
 |
| Which caused difficulties for ironing the seams. I've stuffed a rolled up towel in it. |
 |
| Next up was the buttons for the sleeve closure. I'm making these on Amtrak. |
 |
| This was a 2" square of fabric with a 1 1/4" circle. I then sewed it into a ball, and then sewed the ball vertically to flatten it. This was one of Ibrahim's suggestions, and it made it a lot easier to manipulate the buttons one handed. |
 |
| Button holes |
 |
| Sleeve! |
 |
| I sewed a linen band in to receive the hose ties. I put this in the wrong spot twice. The correct spot is at the modern waist. Shocker. |
 |
| The hose laced in, rather like a kraken |
The first time I wore this, at Mudthaw, I was constantly losing hose ties, but worse, I couldn't really sit down. I sat once the whole day. This was Not Intended. I also didn't intend to have to stand up in court for two hours at the end of the event. Oops, silly me. My feet hurt quite a bit though.
Once I got the band placed right - much higher than I thought - the hose fit splendidly and gave me most of the mobility I needed. I felt great and the way the cote wrapped around my butt to sit made me feel like I was one of the manuscript people.
But even then, all that tension on the middle of the doublet caused it to hang and bunch unattractively. It's covered, but I won't wear it by itself. I think an interlining, and getting the layers aligned better will fix this in a future version.
I had initially intended to make a fingerloop cord for the center lace. I even made one! But it was a few inches too short.

So instead I used more of the rattail, although it has a habit of exploding if you pull on it wrong.

Because the front lacing eyelets were the first eyelets I'd ever made, many were a bit too small. I used a tapestry needle to lace up the doublet, but because I misaligned the holes the first time, and also had one too many eyelets on one side, it took me three tries to get it laced up the night before Mudthaw, and got a blister on my finger from the effort. Whee. It worked though.

This work is licensed under a Creative Commons Attribution-ShareAlike 4.0 International License.
But note that the images are public domain, as they are faithful reproductions of a work in the public domain.

Comments
Post a Comment