Mammen Tablet Woven Band
This is the inaugural post for this blog, where I hope to share the things I think are neat about my medieval research and recreation that aren't brewing related. I have another blog for brewing which I'd like to keep focused, although for really good stuff I might cross-post here.
I'm going to aim to explain things to a non-medievalist audience, or at least an audience not familiar with the specific techniques here although that might involve linking out so I don't have to explain from scratch.
Ok, so.

We often call this twisting warp twining.
This awesome paper by Sarah Goslee presents two laws of tablet weaving (on square tablets) that are important here (and I quote her):

But we can use math to fix this.


 Turn! We're now back where we started, with the odd tablets blue, and the even tablets yellow.
Now, I should point out. This is the way that I do twill tablet weaving. There are many different ways to do it and many of them are probably better than this way. If you think you have a better way, please tell me! But don't tell me to turn tablets individually because I won't do it.


I'm going to aim to explain things to a non-medievalist audience, or at least an audience not familiar with the specific techniques here although that might involve linking out so I don't have to explain from scratch.
Ok, so.
Tablet Weaving
TL;DR:
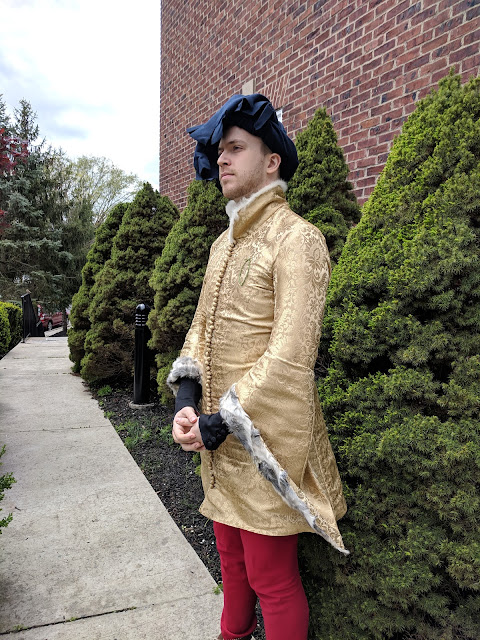
I made this, it's cool and it's based reasonably closely off of a thing they dug out of the ground in Denmark from 970 CE

In the process, I learned a lot about this technique (3/1 broken twill tablet weaving) and have some ideas about how to do it efficiently.
Update: neat high-res photos here.
The Long Part:
There are a lot of ways to make cloth from yarn. Perhaps the most well-known is weaving, where you use a loom to hold a large number of long warp yarns under tension, and use some tools to choose which threads to move up and which to move down, forming a gap (the shed) which you then pass the cross-yarn, the weft through. After passing, a new shed is picked, and the warp passes back across the warps. By repeating this, cloth is built up, one pass of the weft (a pick) at a time, held in place by the warp yarns. |
| https://en.wikipedia.org/wiki/File:Warp_and_weft.jpg |
That's great and people made cloth that way historically. But if you want to make something narrow, like a belt, or a strap, you might need it to be stronger than regular cloth. So maybe you want to make it denser, by running more warp threads. And maybe you want to make it pretty by putting some neat patterns in it.
Enter tablet-weaving. Normal weaving leaves each warp yarn in a single, unique vertical plane through the entire cloth. Some complicated weaves, such as gauze, have warp yarns wandering horizontally a little, but they don't twist.
Tablet weaving breaks that assumption by taking groups of yarns (1) and twisting them around each other as they go up and down and have the warp yarn pass through them. You do this by threading four yarns through a tablet, which you turn a quarter-turn (2) each time you pass the weft:
 |
| https://en.wikipedia.org/wiki/Tablet_weaving#/media/File:Tablet-weaving.svg |
Tablets can be threaded in two ways: following yarns from the cloth being woven towards the tablet, it can enter the tablet from the left, or from the right. We call the first "Z" threading and the second "S" threading because
 |
| From http://www.weavezine.com/content/tablet-woven-dpn-holder.html. This image is non-free. |
This awesome paper by Sarah Goslee presents two laws of tablet weaving (on square tablets) that are important here (and I quote her):
- The warp thread that crosses the face of the band when the tablet is turned is the thread that will be visible in the band.
This means that the thread that stays on top during the turn will be the visible thread for that pick, on top. There's an analogous thread that will be visible on the bottom. - An S-threaded tablet turned forward is structurally equivalent to a Z-threaded tablet turned backwards.
This winds up being particularly relevant later.
Tablets are used in packs of some number so that you get a band and not just four twisted yarns.
Which brings us to the artifact.
Mammen, Denmark
A grave excavated in the 1800s resulted in a variety of artifacts, including several tablet-woven bands. One was woven from wool and a missing fiber (probably linen), and used 17 tablets, and it's the one I'm interested in (the others are brocaded with silver which is another technique I don't know how to do yet).
A paper Det uldne brikvævede bånd fra Mammengraven by Lise Ræder Knudsen (4) describes it as having two outermost tablets with 4 woolen threads, and 15 tablets in the middle carrying two wool threads and two missing vegetable threads. The 15 middle tablets are where the pattern is, and the middle-most 5 tablets were a different color than the other 10.
 |
| Image from the cited paper. Non-free. |
Interestingly, there are two apparent inconsistencies in the pattern which may or may not be intentional:

These are pretty neat patterns!
The way they're woven into the band is through 3/1 broken twill. If you go forward, forward, back and then back (FFBB is how I'm going to notate this), you keep the same color on top of the band, so you get all one color on top and all another on the bottom if your tablets have the top two holes of one color and the bottom two of the other.
If your band is white on top and black on the bottom, the colors you see if you go FFFFFF is WWBBWW. So we can control the color by controlling our turning, although our pixels are two picks long. If we go FFBBFFBB we get one color, and if we invert that sequence for a pixel we get the base color. We can keep that inversion as long as we need:
FFFFBBFFBBBB gives us
WWBBBBBBBBWW, although none of the patterns here require more than two pixels of the pattern color in a row.
I haven't explained how the twill works yet, though. If we do all the turning in sync, we get large gaps in the warp which lets the weft peek through, and the diagonal patterns in the band are hard to do cleanly. Plus, that's not how the band was woven! Each tablet is offset:
1 FFBBFFBB
2 BFFBBFFB
3 BBFFBBFF
4 FBBFFBBF
1 FFBBFFBB
2 BFFBBFFB
3 BBFFBBFF
4 FBBFFBBF...
Which is how the turns work in the extant piece (5). Even when not changing colors, this leaves a neat little diagonal rib characteristic of twill cloth - blue jeans are a common example of twill. If you're wearing them, look closely and you'll see the diagonal. We're using tablets, but we're not twining - each yarn goes up and down, not around. To get the pattern, we change color at one of the forward-backward interfaces, which means that the pixels in each row are offset by a pick. We do twine at color changes.
The edge tablets just turn forward, twining around the weft. This is mostly for stability, and is why they don't carry a color for the pattern.
It's pretty common for people doing this weaving to go through each tablet and turn it individually, but I find that this is fiddly and error-prone. Much better is to separate tablets into packs which all turn the same way, and then turn them. It's reasonable, then, to have a pack for each of the four staggered twill phases, and a pack for each of the four twill phases for the pattern colors - this will always turn the opposite direction of the base color pack for that twill phase.
That's 8 packs, plus whatever you want to do with the edge tablets. 8 packs is pretty unworkable because it becomes very hard to figure out exactly where the shed is.
But we can use math to fix this.
Remember tablet weaving rule number 2? "An S-threaded tablet turned forward is structurally equivalent to a Z-threaded tablet turned backwards."
And look at the odd-numbered twill phases:
1 FFBBFFBB
3 BBFFBBFF
Why, these are just the opposite of each other. If we threaded row 1 S and row 3 Z, we could turn them in the same direction and still have this pattern structurally.
The same is true of the even rows:
2 BFFBBFFB
4 FBBFFBBF
So now we only need 4 packs: odd twill base, odd twill pattern, even twill base and even twill pattern, so long as the tablets are threaded S (odd tablet), then S (even tablet), then Z (odd tablet), then Z (even tablet), and so on.
If we're not doing any pattern, here's how weaving goes:

My tablets are color coded, which helps make things a lot easier to track. The left pack is the odd tablets, and the edge tablets. The right pack is the even tablets.

Turning action shot! Forward, Forward. Also, my legs. I do this with the warp drawn between a table leg and a chair, so I sit cross-legged on a pillow. Comfy!

Find the shed, and pull it apart. Hard. It's important to really separate the yarns fully or you get a lumpy, weird band. Sliding the packs away from the cloth a little can help find a clear shed.

If you're not sure about the shed, peek between the packs. If you picked it wrong, or a thread is caught on a tablet in a bad way, there will be a thread or two going diagonally. Here, we're all good.

Beat hard, and pass the weft. I leave a little loop by pulling the weft around my finger because it lets me control the weft tension while I beat the next pick, AND if I accidentally weave in the same direction twice, it doesn't work when I try to make the loop, so I notice before I make a mistake that's hard to undo.

Now we're going to go forward on the odd tablets and back on the even tablets. Yellow, Red.
I set up the threading on the tablets so that they're all the same color at each turn, which makes proof-checking easier. If you look closely you can see that some tablets are tilted one way and some the other - that's the S and Z threading peeking through.
The edge tablets are free spirits and are off a bit from the other tablets color-wise.

Forward, Back. Then, find the shed, pull it open, beat and pass the weft.

Now we prepare to go back on both packs. But the edge tablets always go forwards! So we pull them to a new pack - if we had a pattern involving the odd pack, this is also where those tablets would go.

Back (pattern and edge tablets go Forward), Back

To finish the cycle, we prepare to go back and forward, and since our odd base tablets are still going back, our edge tablets must live where the odd pattern tablets go.

Now, I should point out. This is the way that I do twill tablet weaving. There are many different ways to do it and many of them are probably better than this way. If you think you have a better way, please tell me! But don't tell me to turn tablets individually because I won't do it.
How do patterns work?
I converted the patterns from the paper into a draft for use weaving.

The big section on the left is the pattern itself. X marks a tablet that I pull into the pattern pack - it lives in that pack for two picks, and is returned to the base pack after those two picks. This happens automatically as I'll explain below, so there's no need to mark that explicitly.
The next column (only appearing on the bottom four rows) is a reminder of the colors I should be seeing in the base packs. If I lose count of where I am, they'll help me return to the right spot. If I make a mistake turning, they'll help me spot it early. Green should never appear in a base pack - I've caught errors early because of this rule!
The final two columns indicate the odd and the even turning direction for the base packs.
Great. Let's get weaving.


The first turn has no pattern, so it's the same as before doing a plain twill. Forward, Forward.

I use a safety pin (conveniently, you can use them to hold your tablets together and in order when you're not weaving!) to mark where I am on the pattern. After I pass the weft, I advance it.
Now we have an X in the fourth even tablet, the one in the middle.

Pull that tablet out of the pack. You don't have to pull it totally away, just enough to turn it easily. The less space you take, the easier it will be to find a clean shed after turning.

Turn! Odd base pack goes forward, even base pack goes back, so the even pattern pack goes forward. We see green on the even pattern tablet, but that's ok - it's the pattern so it's allowed to be green.

Because I'm weaving in sticky wool, I need to slide the packs a little to find the shed. Compacting them also helps, and you can compact them almost fully while still being able to easily pull out your pattern tablets (now helpfully a different color) for the next pick.

On the next turn, we're going to be going back and back, so since our odd tablets are going backwards, the edge tablets get moved to the pattern pack. And we have a pattern for that pack too! The middle two odd tablets. Note that the single pattern tablet in the even pack is still there.

Turn! Odd base back, odd pattern forward, even base back, even pattern forward.

Here's the part that makes this work nicely. You'd think that since we had four packs while turning, we're going to have four packs to deal with when trying to find the shed. But we don't! Our even pack has completed its two pick-long pixel and all the tablets are in the same state. So we can compress that into one pack. This is why the pattern tablets automatically return to the base pack after each pixel.
By smushing the odd base and pattern packs together, we can get this down to 2.5 packs, which is manageable. Remember that you can peek between the two to spot stray threads.

For our fourth pick, we choose new even pattern tablets, which are the two just off of the middle (see the pattern above).

Back and Forward, with the pattern packs turning oppositely.

We can use the same compression trick to reduce the odd packs now that they're in the same state, and we've completed our four-pick cycle with a pattern still on the even packs.
There's a few things I really like about this method, although it does rely on having colored edges of the tablets for some of them:
- You can visually spot check that your pattern is correct after you've pulled the pattern packs out. If it's wrong, fixing it is easy because you just slide tablets around. Undoing bad turns is hard and confusing.
- With the colored tablets, you get error detection early because you get colors that shouldn't happen.
- With the colored tablets, your pattern pack is different when you're in the middle of a pick, so it's hard to grab the wrong tablets by mistake.
- Collapsing the packs makes finding the shed manageable.
- Not turning tablets individually means you stay sane. I can do this while watching TV and not make many mistakes.
Here's how the band turned out (again. This is the same photo as at the top):

I made a few mistakes, some of which I left in because they were too much of a pain to fix. But it totally worked!
I'd like to thank Alienor Salton for teaching an introductory tablet weaving class at the Whyt Whey A&S night / commons meeting a few months back. Without that I wouldn't have gotten started on this project.
Footnotes:
- Typically four, although variants exist. You can even do "regular" weaving using tablets but let's not talk about that.
- Typically. Again, there are tons of variants. Doing "regular" weaving involves a half turn.
- I'm ignoring eighth turns.
- Published in Mammen : Grav, kunst og samfund i vikingetid, and probably in other places
- Or possibly with the twill going the other way. I'm not sure and don't want to dig it out of the Danish since it's not that important.
This work is licensed under a Creative Commons Attribution-ShareAlike 4.0 International License.

That's a pretty nice explanation. I didn't read it quite totally in detail, but I'm a 3/1 twill geek, so I could get away with skimming. And I'm a single-pack with detailed turning draft kind of guy. That works for me.
ReplyDeleteNote that the literature is not uniform on what an S-threaded card actually is. You have clearly defined the term as you use it, and that is essential. Kudos. Just know that half the world reverses the terms.
I'm curious if you have a sense of how long it took you to weave an inch of pattern?
About 20-30 minutes if I don't make any mistakes. For the purpose of this post it doesn't actually matter whether you reverse the Ss and Zs, although I'm going to post a follow-up about how the twill direction impacts whether or not you get a clean line, and that does matter.
DeleteActually, maybe faster than that. I didn't really time it...
Delete